I Built a Shader Editor Right Into My Website

In 2023, I saw a tweet, and linked in the mentions was this video. I was intrigued by how a few lines of code could create such beautiful visuals. I watched it out of curiosity, and it completely blew my mind. I created a Shadertoy account soon after and have been experimenting and learning about computer graphics and creative coding ever since.
In this post we’ll look at how I added a Shadertoy-style editor to my personal website.
Before we jump into the build, let’s learn a bit about Shaders. What is a Shader ?
Shader is program that runs on GPU and is part of Graphics Pipeline
In simple terms, the Graphics Pipeline is the process that computers use to render visuals on the screen and shaders are programs that tells the computer how to render those visuals.
There are many types of Shaders, but the ones that we are interested in are -
Vertex Shader → These compute vertex positions on the screen based on the input data provided to the Graphics Pipeline
Fragment Shader → These compute color for each pixel based on the input data provided to the Graphics Pipeline.
Fragment Shaders are what you write on platform like Shadertoy to create visuals by coloring each pixel on the screen. The code in fragment shader runs for every pixel of the screen, in parallel on GPU.
Shader programs are written in a Shading Language defined by the Graphics API. For OpenGL and WebGL, that language is called GLSL (Open GL Shading Language). It has syntax similar to C , but is much simpler and minimal.
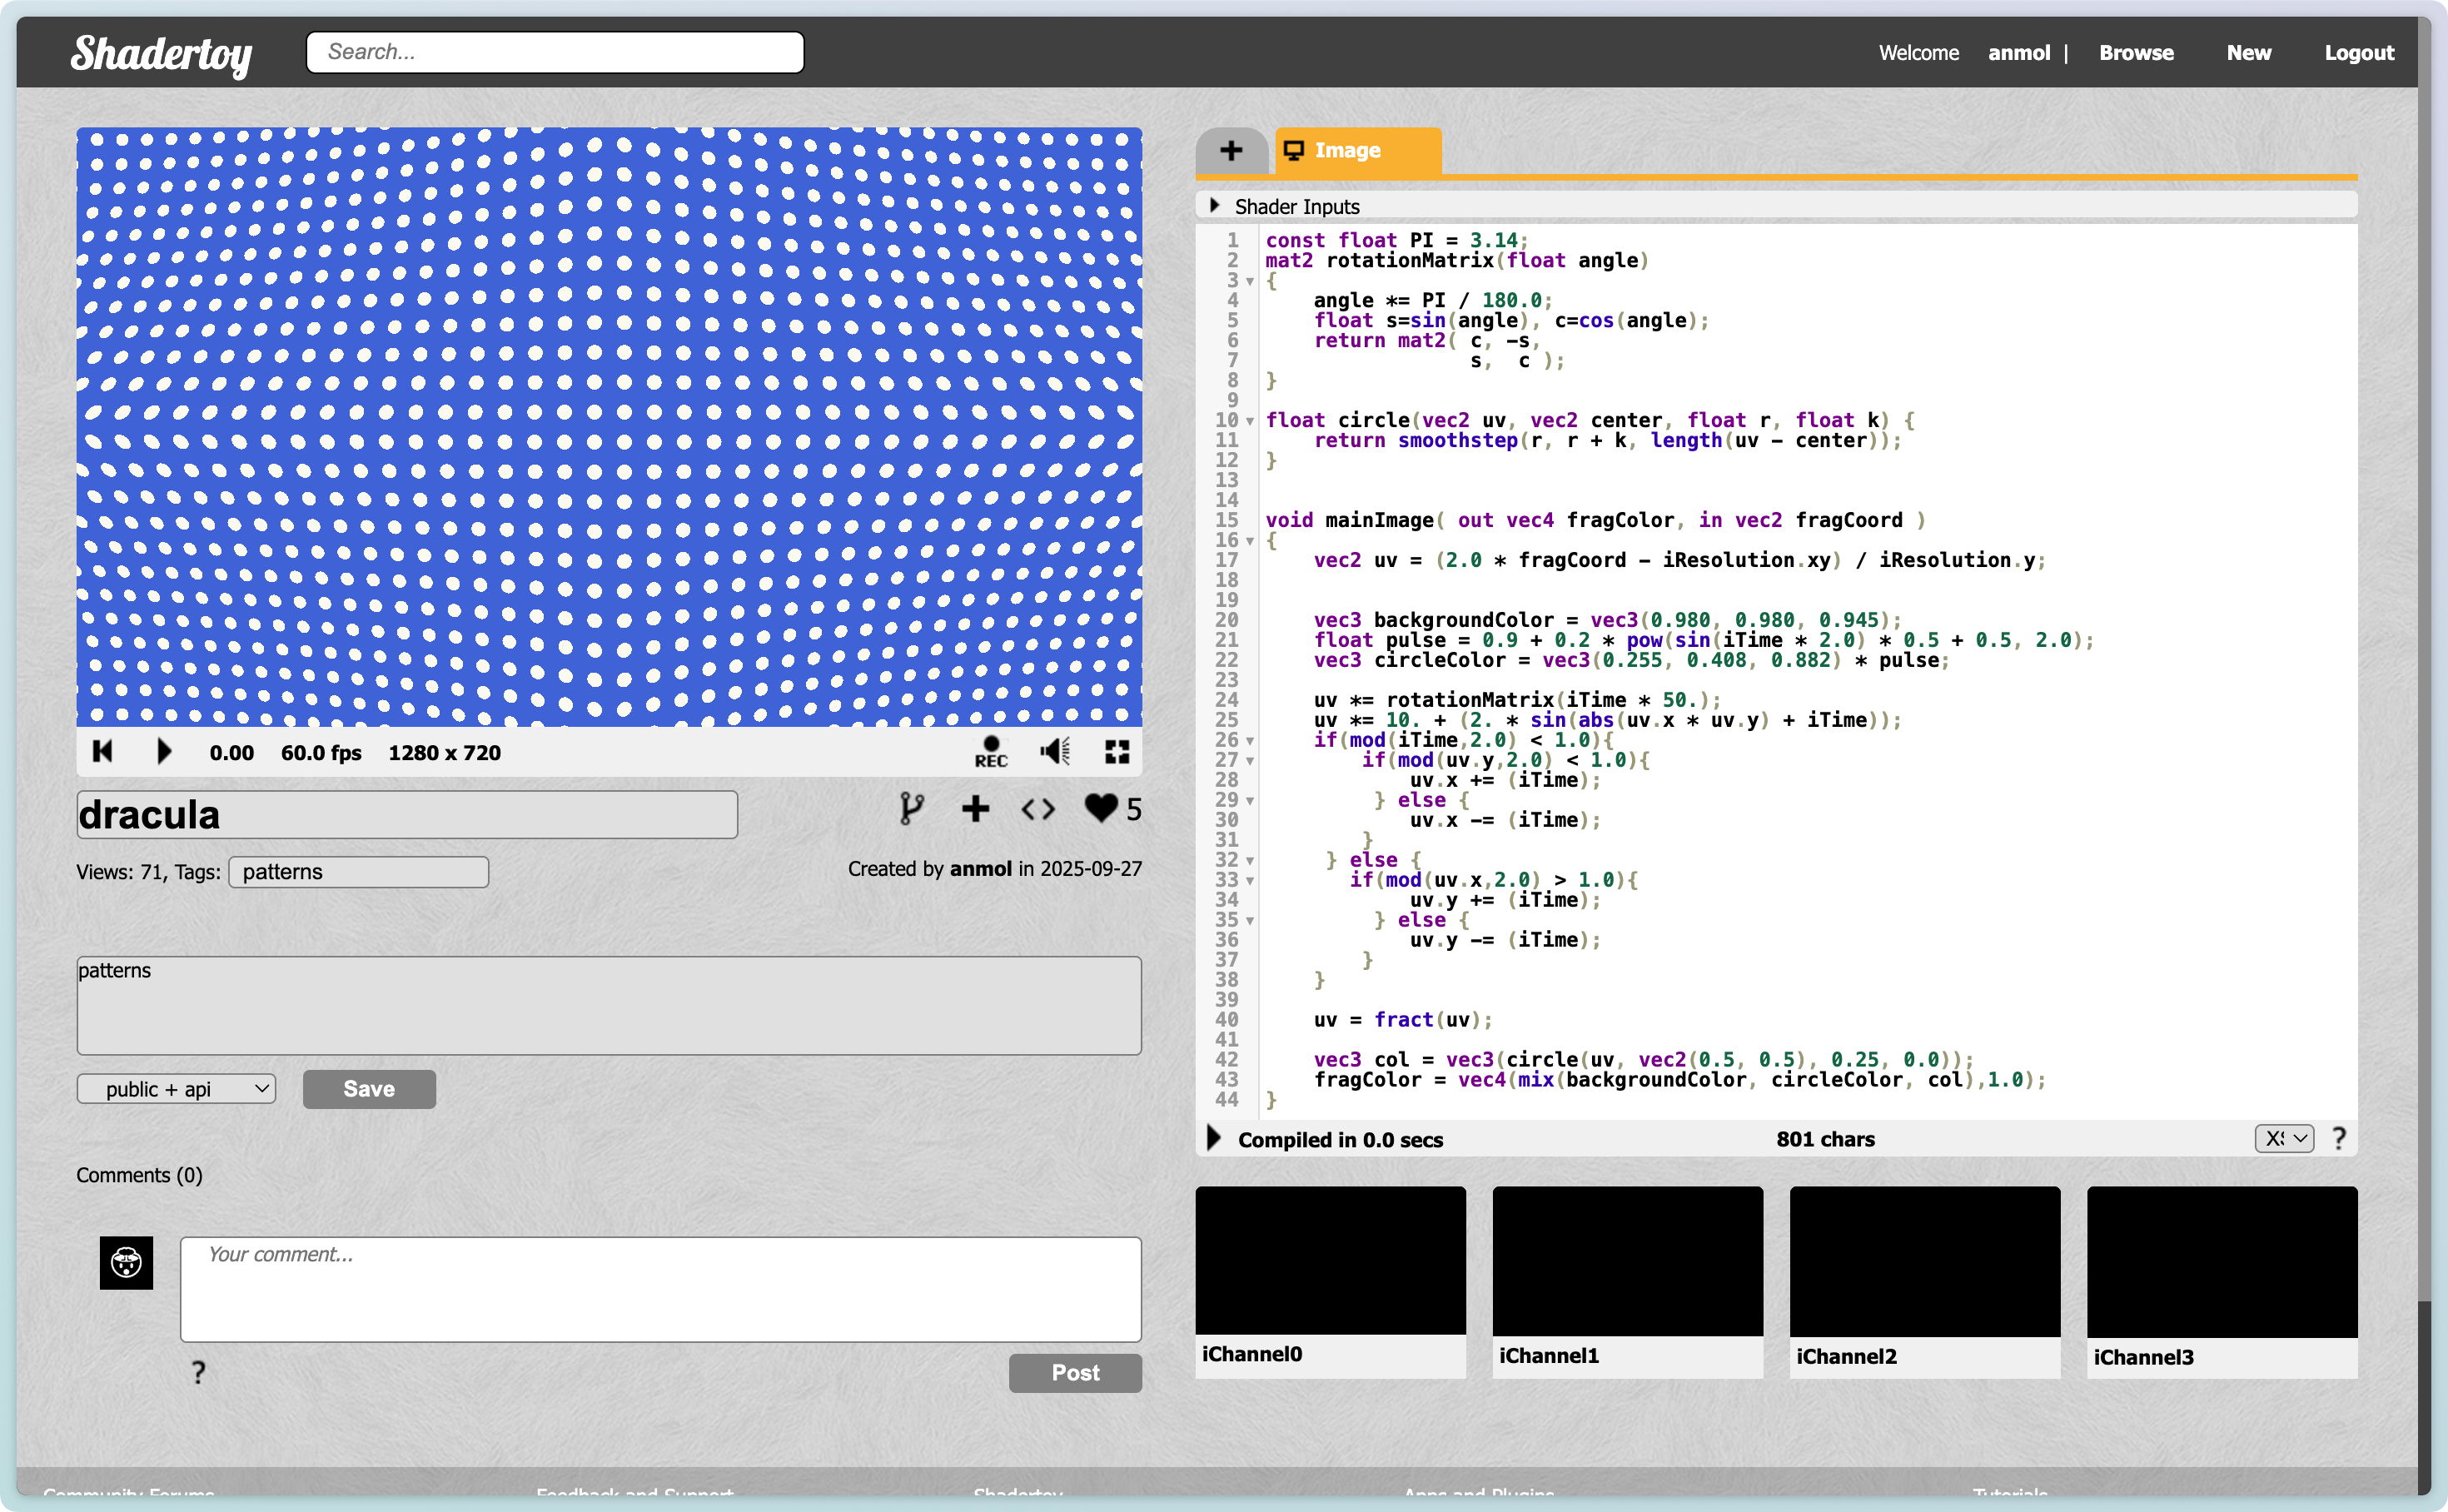
Here’s a Shader written in GLSL on Shadertoy - dracula
With that background out of the way, let’s look at how I implemented this on my website.
My Website
My personal website mimics Windows 95 Desktop. It is built using Astro. It has Windows, TaskBar and Shortcuts.
Each Window is a astro component which takes in title, icon, data attribute and dynamic component using astro slots.
Window.astro
-------------------------------
<Window windowDataAttr=”about_me” title=”About Me” windowIcon=”Info.ico”>
  <div>
    Hello, internet! I’m Anmol. I’m a <b>Software Engineer</b>.
...
</Window>
With the help of data-attributes and an event handler function we achieve windowing.
windowEventHandler.ts
-------------------------------
function windowEventHandler
  windowDataAttr: string,
  event: “SHOW” | “TOGGLE” | “CLOSE” | “RESIZE”
) {
  const windowDiv: HTMLDivElement | null = document.querySelector(
    `[data-window=${windowDataAttr}]`
  );
  switch (event) {
    case “SHOW”:
        // move windowDiv to the front.
        break;
    case "TOOGLE":
...
}
To add something like Shadertoy all we have to do is create the following windows and bind event handlers accordingly
Shaders - This will display the currently selected Shader and a list to shaders to select.
Shader Editor - This will be used to edit the Shader running on Shaders window.
Shaders Window
This Window will display the live Shader program. To run shader code we need to setup an environment for the Graphics API. In the case of a Web Page we use HTML <canvas> element and render using WebGL on it.
The Shaders Windows looks like this -
Shaders.astro
-------------------------------
...
<Window windowDataAttr=”shaders” title=”Shaders” windowIcon=”Beizer.ico”>
  ...
  <canvas id=”shader-canvas”></canvas>
</Window>
Next we will setup the HTML <canvas> element to render our Shader programs.
We will create a function called initShaderCanvas. Here’s what it does -
Selects the HTML <canvas> element we defined in Shaders window
Gets the WebGL2 rendering context using canvas.getContext(”webgl2”, {…}) , which gives us access to the Graphics API Interface.
Initialize the Shader program by calling initShader().
Calls requestAnimationFrame(render) which tells the browser we want to animate and call render() each time before next repaint.
initShaderCanvas.ts
-------------------------------
let GL_GLOBAL: WebGL2RenderingContext | null;
...
function initShader(gl: WebGL2RenderingContext) {
   ...
}

function render() {
   ...
}
...
export function initShaderCanvas() {
  const canvas = document.getElementById(”shader-canvas”) as HTMLCanvasElement;
  if (canvas) {
    let gl = canvas.getContext(”webgl2”, { antialias: true });
    GL_GLOBAL = gl;

    if (!gl) {
      return;
    }

    /* Some WebGL2 Config */

    // Initialize
    initShader(gl);

    requestAnimationFrame(render);
  }
}
The initShader() function takes in the WebGL2 Rendering Context and sets up the Shader program using a Vertex Shader and Fragment Shader. It also sets up some parameters like time, resolution etc that we can utilize in Shader program.
initShaderCanvas.ts
-------------------------------
let GL_GLOBAL: WebGL2RenderingContext | null;
...
function initShader(gl: WebGL2RenderingContext) {
  const fragmentShaderSource = ...;
  let vertexShader = createShader(gl,
    gl.VERTEX_SHADER,
    vertexShaderSource);
  let fragmentShader = createShader(gl,
    gl.FRAGMENT_SHADER,
    fragmentShaderSource
  );
  if (!vertexShader || !fragmentShader) return;

  const program = createProgram(gl, vertexShader, fragmentShader);
  if (!program) return;

  currentProgram = program;

  / * Data Attribute and Uniforms Setup */

}

function render() {
   ...
}
...
export function initShaderCanvas() {
   ...
}
The render() function is responsible for drawing on the HTML canvas - it is called before every browser repaint - it renders the shader program we created in initShader() and updates parameters like time, resolution, mouse position.
initShaderCanvas.ts
-------------------------------
let GL_GLOBAL: WebGL2RenderingContext | null;
...
function initShader(gl: WebGL2RenderingContext) {
   ...
}

function render() {
  time *= 0.001; // convert to seconds
  if (!GL_GLOBAL) {
    return;
  }

  resizeCanvasToDisplaySize(GL_GLOBAL.canvas as HTMLCanvasElement);

   /* WebGL2 rendering + updating uniforms */

  requestAnimationFrame(render);
}
...
export function initShaderCanvas() {
   ...
}
Here’s the Shaders Window we have been configuring in action - it’s rendering the same shader program we showed from Shadertoy at the start of the post!
(We have not gone into details how WebGL2 works or how shader programs are compiled - check out WebGL2 Fundamentals to learn more)
Shaders Editor
This Window will allows us to edit the Fragment Shader code of the current shader program. We will use the HTML <textarea> to display and edit the Fragment shader code.
The Shader Editor window looks like this -
ShaderEditor.astro
-------------------------------
<style>
  ...
</style>
<script>
  import { updateShader } from “../../scripts/initShadersCanvas”;
  /* Update Shader on clicking Save using updateShader() */
</script>
<Window
  windowDataAttr=”shader-editor”
  title=”Shader Editor”
  windowIcon=”Notepad writing.ico”
  hideInStart={true}
  noPadding
>
  <div id=”shader-editor-app-bar” slot=”app-bar”>
    <div id=”shader-editor-save-button”><u>S</u>ave</div>
  </div>
  <textarea id=”shader-editor-textarea” autofocus></textarea>
</Window>
We also add App Bar to our Window component using astro slots. We can now add menu options like New, Save, Edit, Open etc within individual windows.
Shadertoy uses a custom function called mainImage(…) instead of the standard GLSL main(). Since we want to run Shaders written on Shadertoy, we will call the Shadertoy mainImage() from GLSL’s main(). We will also add uniforms (like time - iTime, resolution - iResolution) that Shadertoy expects.
initShaderCanvas.ts
-------------------------------
let GL_GLOBAL: WebGL2RenderingContext | null;
...
function initShader(gl: WebGL2RenderingContext) {
  const fragmentShaderSource = `#version 300 es
precision highp float;

uniform vec3 iResolution;
uniform vec2 iMouse;
uniform float iTime;

out vec4 outColor;

${(window as any).currentFragmentShaderSource}

void main() {
    mainImage(outColor, gl_FragCoord.xy);
}
`;
   ...
}
...
We attach a property to HTML window object called currentFragmentShaderSource. This will store the code for current Fragment Shader. We will use JavaScript to update this when the Save button is clicked by calling updateShader() on Shader Editor window.
initShaderCanvas.ts
-------------------------------
import SHADERS from “./shaders.ts”;
let GL_GLOBAL: WebGL2RenderingContext | null;
...
export function initShaderCanvas() {
  (window as any).currentFragmentShaderSource = SHADERS[”FRACTAL_CIRCLES”];
   ...
}

export function updateShader() {
  if (GL_GLOBAL) {
    initShader(GL_GLOBAL);
  }
}
Here’s the Shaders Editor Window we have been configuring in action - we can view and edit the Fragment shader code of the current Shader program.
Putting It All Together
Finally, we add a list of available shaders that can be accessed from the Shaders Window and a New button to start from scratch. The editor supports most shaders from Shadertoy (though not all).
I hope you enjoyed reading through this post! You can check it out and play around with it live on anmol.ninja.